Tag: github

8 notes found.

免费版私有仓库不支持 GitHub 原生 auto-merge(API 对 allow_auto_merge=true 返回 200 但静默不生效,和 branch protection 一样提示 “Upgrade to GitHub Pro”)。此时 Renovate 托管版 App 默认的 platformAutomerge: true 会失效:PR 上写着 “Automerge: Enabled” 却永远不会合并。

解法:让 Renovate 自己合并 PR,并去掉周期限制(依赖 group:allNonMajor 已把所有 minor/patch 合并成一个 PR,提高频率不会增加噪音):

{
  "$schema": "https://docs.renovatebot.com/renovate-schema.json",
  "extends": [
    "config:recommended",
    "group:allNonMajor"
  ],
  "rangeStrategy": "bump",
  "dependencyDashboard": false,
  "labels": ["dependencies", "renovate"],
  "automerge": true,
  // 免费版私有仓库用不了 GitHub 原生 auto-merge,由 Renovate 自己合并
  "platformAutomerge": false,
  "packageRules": [
    {
      matchDepTypes: ["peerDependencies"],
      enabled: false,
    },
  ],
  "ignoreDeps": ["node"],
}

排查要点:PR API 返回 autoMergeRequest: null 且 CI 全绿、无 branch protection,却仍不合并,基本就是这个原因。
在 GitHub 页面一键打开对应仓库的 DeepWiki 文档,以及通过 url scheme 唤起本地 Logseq、VSCode 等应用,减少手动拼 URL 的操作。

插件地址:https://chromewebstore.google.com/detail/open-with-for-github/iaicdcencbmacjlfdbgaggfmikfpicig?authuser=0&hl=en

原理

利用 GitHub 仓库页当前的 owner/repo 拼出目标地址,并用 chrome.tabs 或 URL scheme 打开。

实际配置(ghq 管理,本地路径 ~/ghq/github.com/{owner}/{repo}

  • DeepWiki:https://deepwiki.com/{owner}/{repo}
  • Logseq:logseq://graph/MyLifeRecorded?page=github.com/{owner}/{repo}
  • Zed:zed://file/Users/zhaochunqi/ghq/github.com/{owner}/{repo}
  • VSCode:vscode://file/Users/zhaochunqi/ghq/github.com/{owner}/{repo}

示例代码

在 content script 中读取仓库路径,把 github.com/a/b 转为 {owner}/{repo}

// location.href 形如 https://github.com/tauri-apps/tauri
const match = location.href.match(/github\.com\/([^/]+)\/([^/]+)/);
const owner = match[1];
const repo = match[2];

// 打开 DeepWiki
chrome.tabs.create({ url: `https://deepwiki.com/${owner}/${repo}` });

// 打开本地应用(ghq 路径,注意需要 encode 路径中的空格等字符)
location.href =
  `vscode://file/Users/zhaochunqi/ghq/github.com/${owner}/${repo}`;

注意

  • 本地 url scheme 需要系统已注册对应 handler(VSCode 默认注册 vscode://,Zed 注册 zed://),否则会被浏览器忽略。

在 GHCR 里看到很多 untagged,不一定代表清理任务漏删了垃圾镜像。

如果一个 Docker 镜像是 multi-arch 构建,比如同时构建:

platforms: linux/amd64,linux/arm64

那么一个 tag 通常不是直接贴在某个具体平台镜像上,而是贴在一个“目录”上。这个目录的正式名字叫 OCI image index 或 manifest list。

可以把它理解成:

ghcr.io/org/app:sha-xxxxxxx
  -> 一个总入口 / 目录
      -> amd64 机器用的镜像
      -> arm64 机器用的镜像

用户拉镜像时还是用同一个 tag:

docker pull ghcr.io/org/app:sha-xxxxxxx

Docker 会根据本机架构自动挑正确的子镜像。amd64 机器拿 amd64,arm64 机器拿 arm64。

为什么会显示成 1 tagged + 4 untagged

以一个同时构建 linux/amd64linux/arm64,并且没有关掉 buildx 默认 provenance 的镜像为例,一次构建大致会产生:

1 个 tagged image index
2 个 untagged platform image manifest
2 个 untagged provenance attestation manifest

所以 GHCR 页面上看起来就是:

1 tagged + 4 untagged

这里的 2 个 platform manifest 是真正给不同 CPU 架构运行用的镜像。它们没有自己的 tag,因为 tag 贴在上层 image index 上。

另外 2 个 provenance attestation manifest 不是运行镜像,而是构建证明。它们记录“这个镜像是从哪个 repo、哪个 commit、哪个 Dockerfile、哪次 GitHub Actions run 构建出来的,以及用了哪些基础镜像/构建依赖”。常见格式是 in-toto statement,predicate 是 SLSA provenance。

这些 untagged 可以删吗

不要只看 GHCR UI 上写着 untagged 就手动删。

如果这些 untagged 是被某个保留 tag 引用的子 manifest,删掉以后可能会破坏 multi-arch 镜像,或者丢掉 provenance 证明。正确的清理逻辑应该理解 image index 和它下面的子 manifest,而不是把所有 UI 上的 untagged 都当成孤立垃圾。

dataaxiom/ghcr-cleanup-action 这类专门处理 GHCR 清理的工具,会把 multi-arch image、attestation、referrer 这些关系一起考虑。删除旧 tagged image 时,它会连同下面的子 manifest 一起处理;保留新 tagged image 时,被引用的 untagged 子 manifest 也应该留下。

GitHub 能避免这种显示吗

GHCR 目前没有一个开关可以说“不要把被 image index 引用的子 manifest 显示为 untagged”。它是按 registry 里的 manifest/version 展示,所以 UI 会显得比较吵。

能减少数量,但都有代价:

  • 关掉 provenance:每批少两个 attestation,代价是没有构建来源证明。
  • 只构建单平台:少一个平台镜像,代价是不再同时支持 amd64/arm64。
  • 单平台并关掉 provenance:最干净,但功能和供应链信息都缩水。

更实用的判断是:不要追求 GHCR 页面上完全没有 untagged,而是区分“孤立 untagged”和“被保留 tag 引用的 untagged 子 manifest”。前者可以清理,后者是镜像结构的一部分。

GitHub token 校验不要依赖固定长度,尤其不要写类似 ghs_[A-Za-z0-9]{36} 的正则。

GitHub 官方文档列出的 token 前缀包括:

  • ghp_: classic personal access token
  • github_pat_: fine-grained personal access token
  • gho_: OAuth access token
  • ghu_: GitHub App user access token
  • ghs_: GitHub App installation access token
  • ghr_: GitHub App refresh token

2026-04-27 起,GitHub App installation token 会逐步切到 stateless 格式,ghs_ token 会变成类似 ghs_APPID_JWT 的结构,长度约 520 字符且会变化。JWT 部分也不应该由客户端解析或校验语义。

如果业务只是想拦住明显错误的输入,可以只做轻量格式检查:

const githubTokenRe = /^(?:(?:ghp|gho|ghu|ghs|ghr)_|github_pat_)[A-Za-z0-9_.-]+$/;

这个校验只确认是 GitHub 已知 token 前缀,并允许 JWT 常见的 .-。真正有效性仍然应该交给 GitHub API 返回 401 Bad credentials 之类的结果判断。

更稳的原则:

  • token 当作 opaque string,不解析内部内容
  • 不限制固定长度
  • 存储字段至少能放下 520 字符以上
  • Actions 里优先使用内置 GITHUB_TOKEN,跨 repo 或特殊权限才使用 PAT 或 GitHub App

参考:

  1. GitHub Docs: GitHub’s token formats
  2. GitHub Changelog: Notice about upcoming new format for GitHub App installation tokens

今天学到了可以在对应的 pr 中添加 .diff 直接查看 diff, 然后可以将链接直接丢给在线的 ai 大模型给你 review

比如 https://github.com/zhaochunqi/git-open/pull/24 可以使用 https://github.com/zhaochunqi/git-open/pull/24.diff, 然后提交给大模型说:review https://github.com/zhaochunqi/git-open/pull/24.diff 即可,我看了下纯文本,感觉复制粘贴都行。

参考链接:Get an AI code review in 10 seconds

使用 https://github.com/marketplace/actions/create-pull-request 的时候遇到无法创建 pr 的问题,需要做如下配置:

1. 检查仓库设置

请访问:如:https://github.com/zhaochunqi/dns/settings/actions (替换成你自己的) 找到 “Workflow permissions” 部分,确保:

  • ✅ 选择 “Read and write permissions”
  • ✅ 勾选 “Allow GitHub Actions to create and approve pull requests”

2. workflow 中添加

permissions:
  contents: write
  pull-requests: write

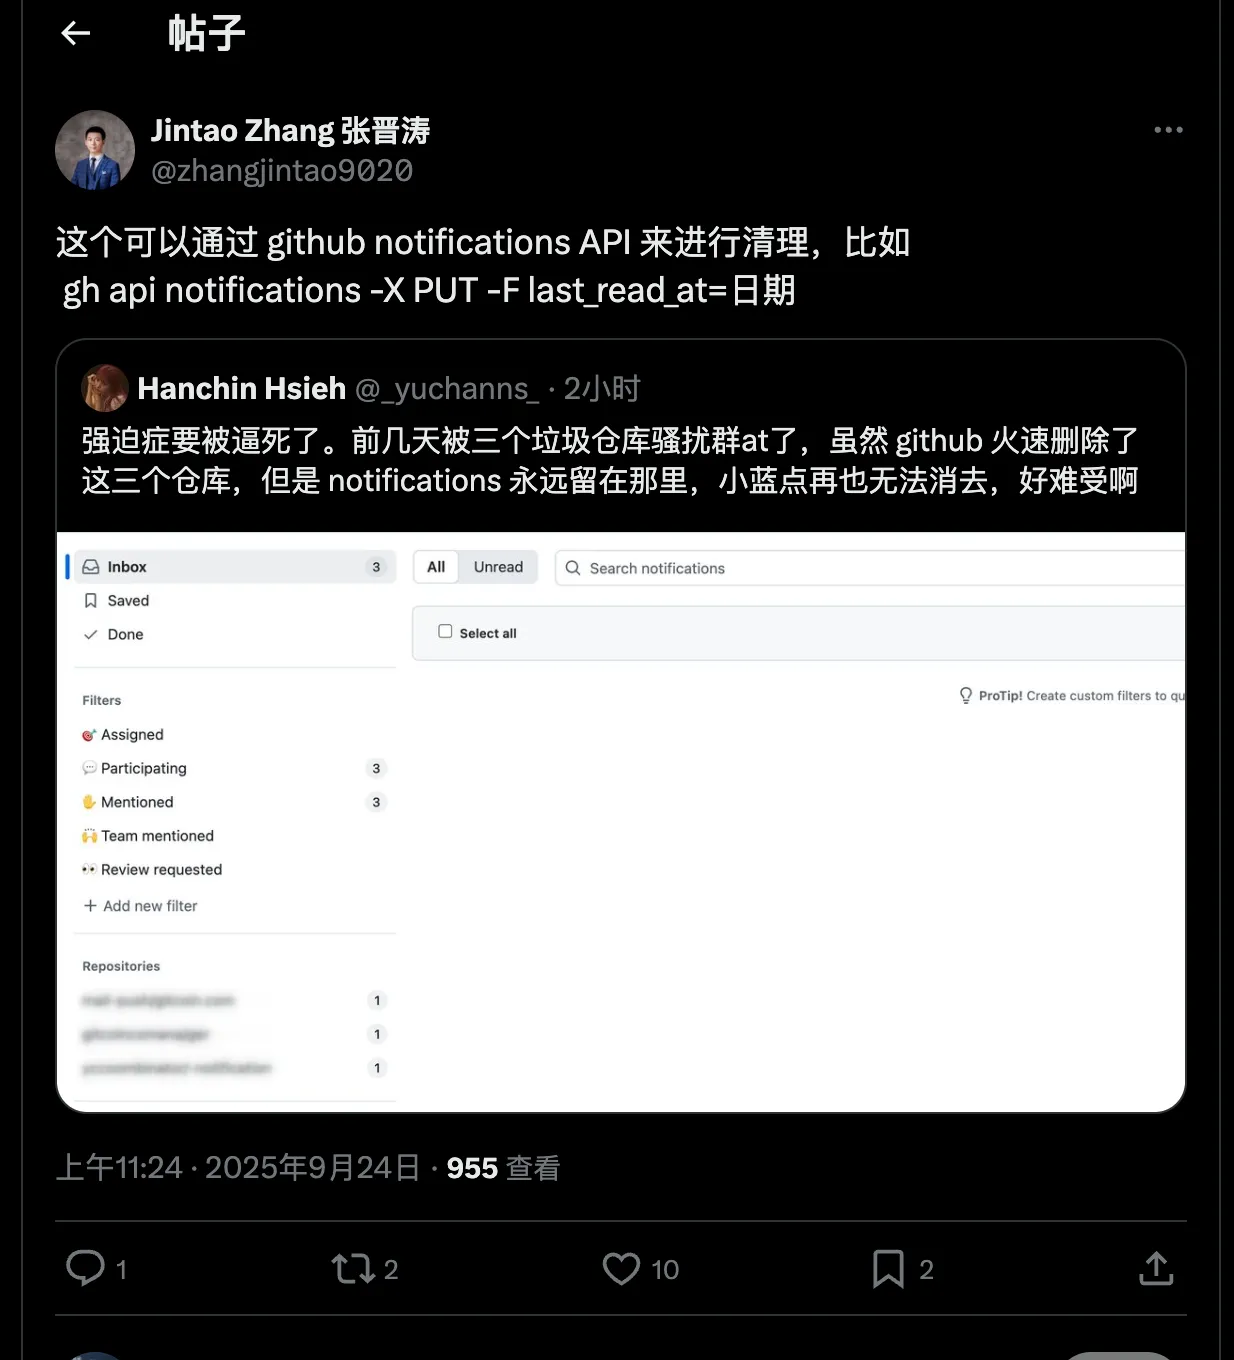
github 中有一些垃圾钓鱼信息会 @ 你,在 官方 处理之后,你的 github 信息中的 notification 由于已经不存在了导致无法正常清理。

通知截图

解决方法如上如:gh api notifications -X PUT -F last_read_at=2025-09-24 这样即可。

来源